Fill a document from scans
The fill wizard step by step: choose a template, upload the scans, check the recognised data, and download the finished .docx or PDF.
Before you start
You need a template (see Getting started) and the documents it asks for: scans or phone photos of a passport, an extract, an invoice. PNG, JPG and PDF are accepted.
Open Templates and press Fill on the template you need, or choose Upload scans on the dashboard. The wizard has three steps.
Step 1. Upload the required scans
Each document the template needs has its own slot, with its name and whether it is required.
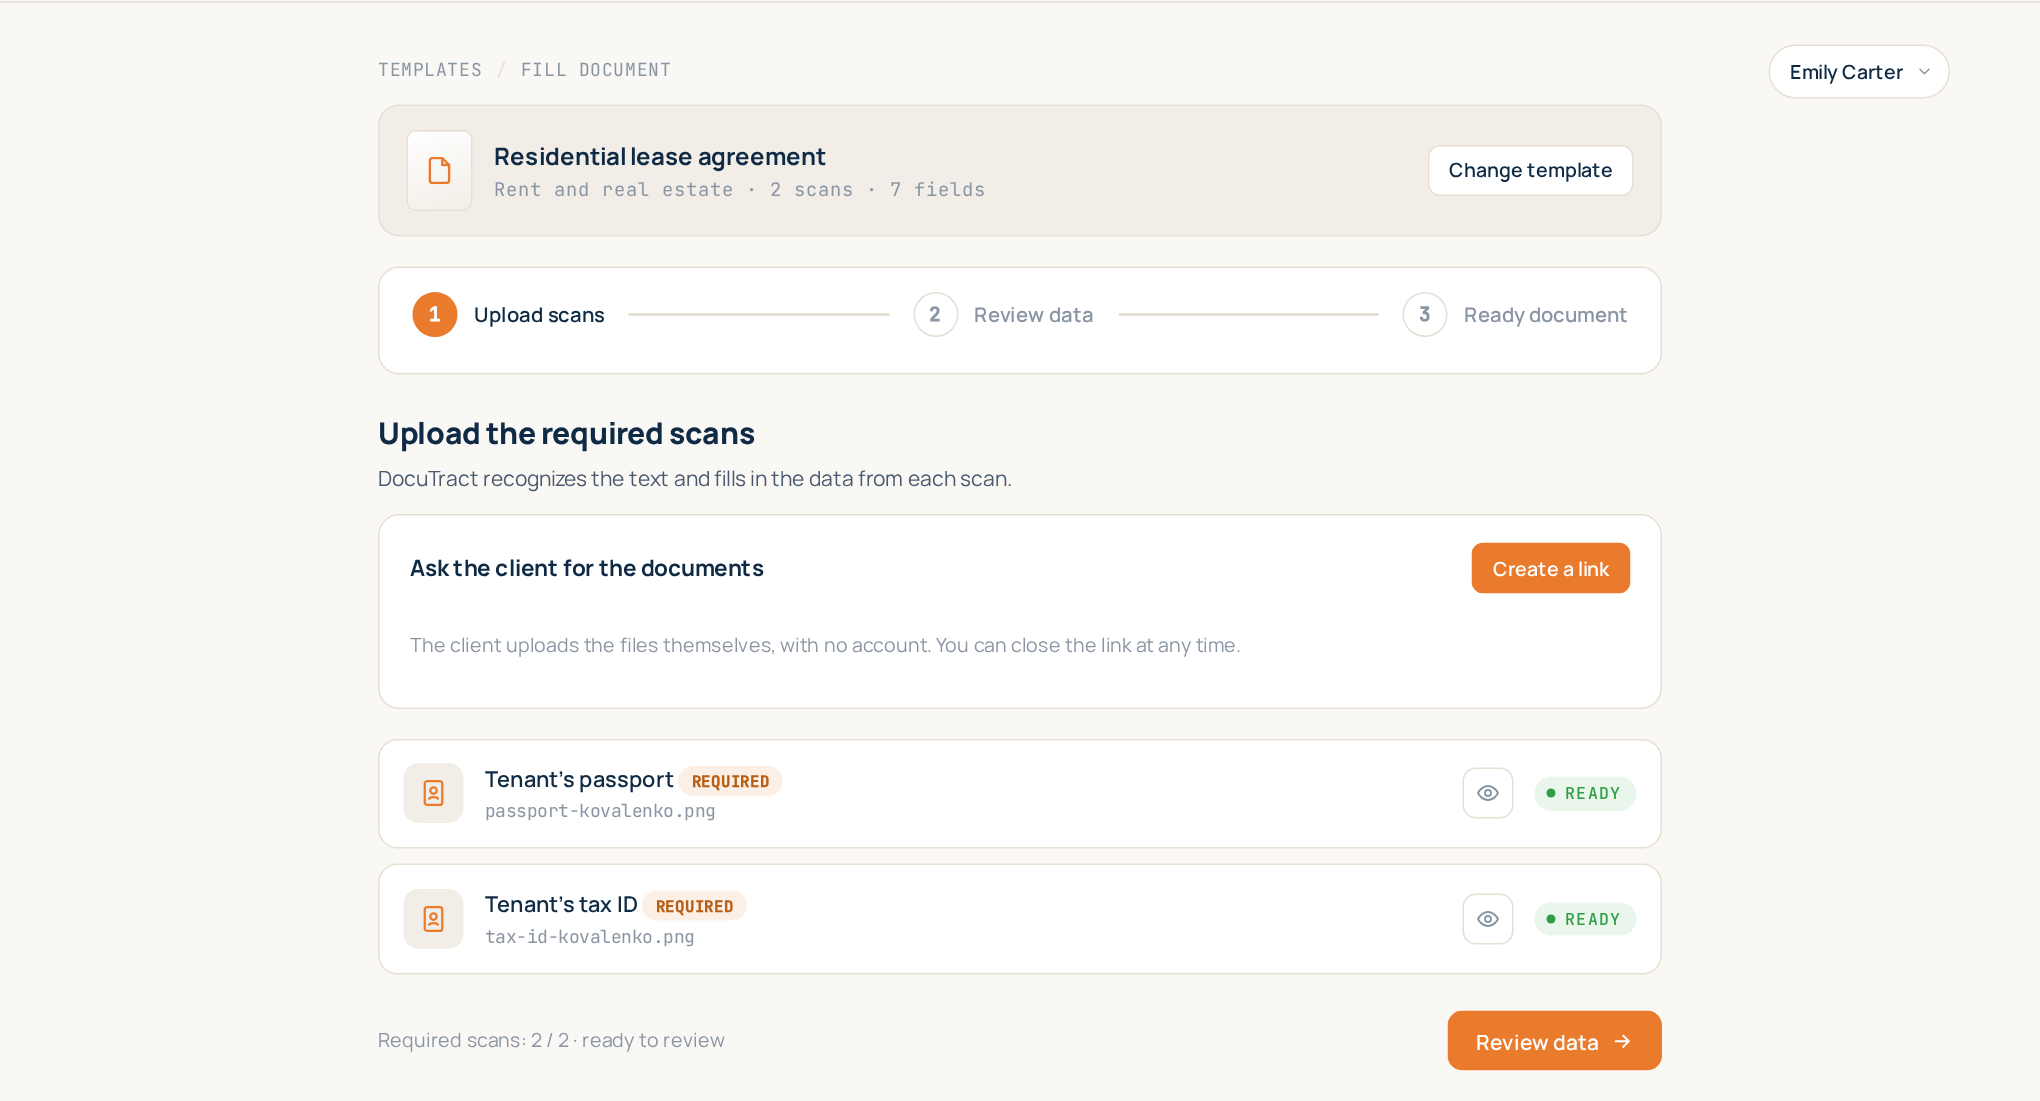
- Press Upload on a slot and choose the file.
- A document with several pages? Use Add more pages and add the rest. A page uploaded by mistake is removed with Remove page.
- DocuTract starts recognising the text straight away. The slot shows OCR while it works and Ready when it is done. You can upload the next slot in the meantime.
When every required scan is ready, press Review data.
Do not have the documents yourself? Use Ask the client for the documents to send the client a link to upload them. See Collecting documents from the client.
When every scan of the template is optional, the step is called Scans to fill in automatically: the scans only save typing, so you can press Fill in by hand straight away. A template that reads no scans at all has no such step: filling starts with the data.
Step 2. Review the recognised data
DocuTract shows a table: the Document field, the Recognized value and the Confidence.
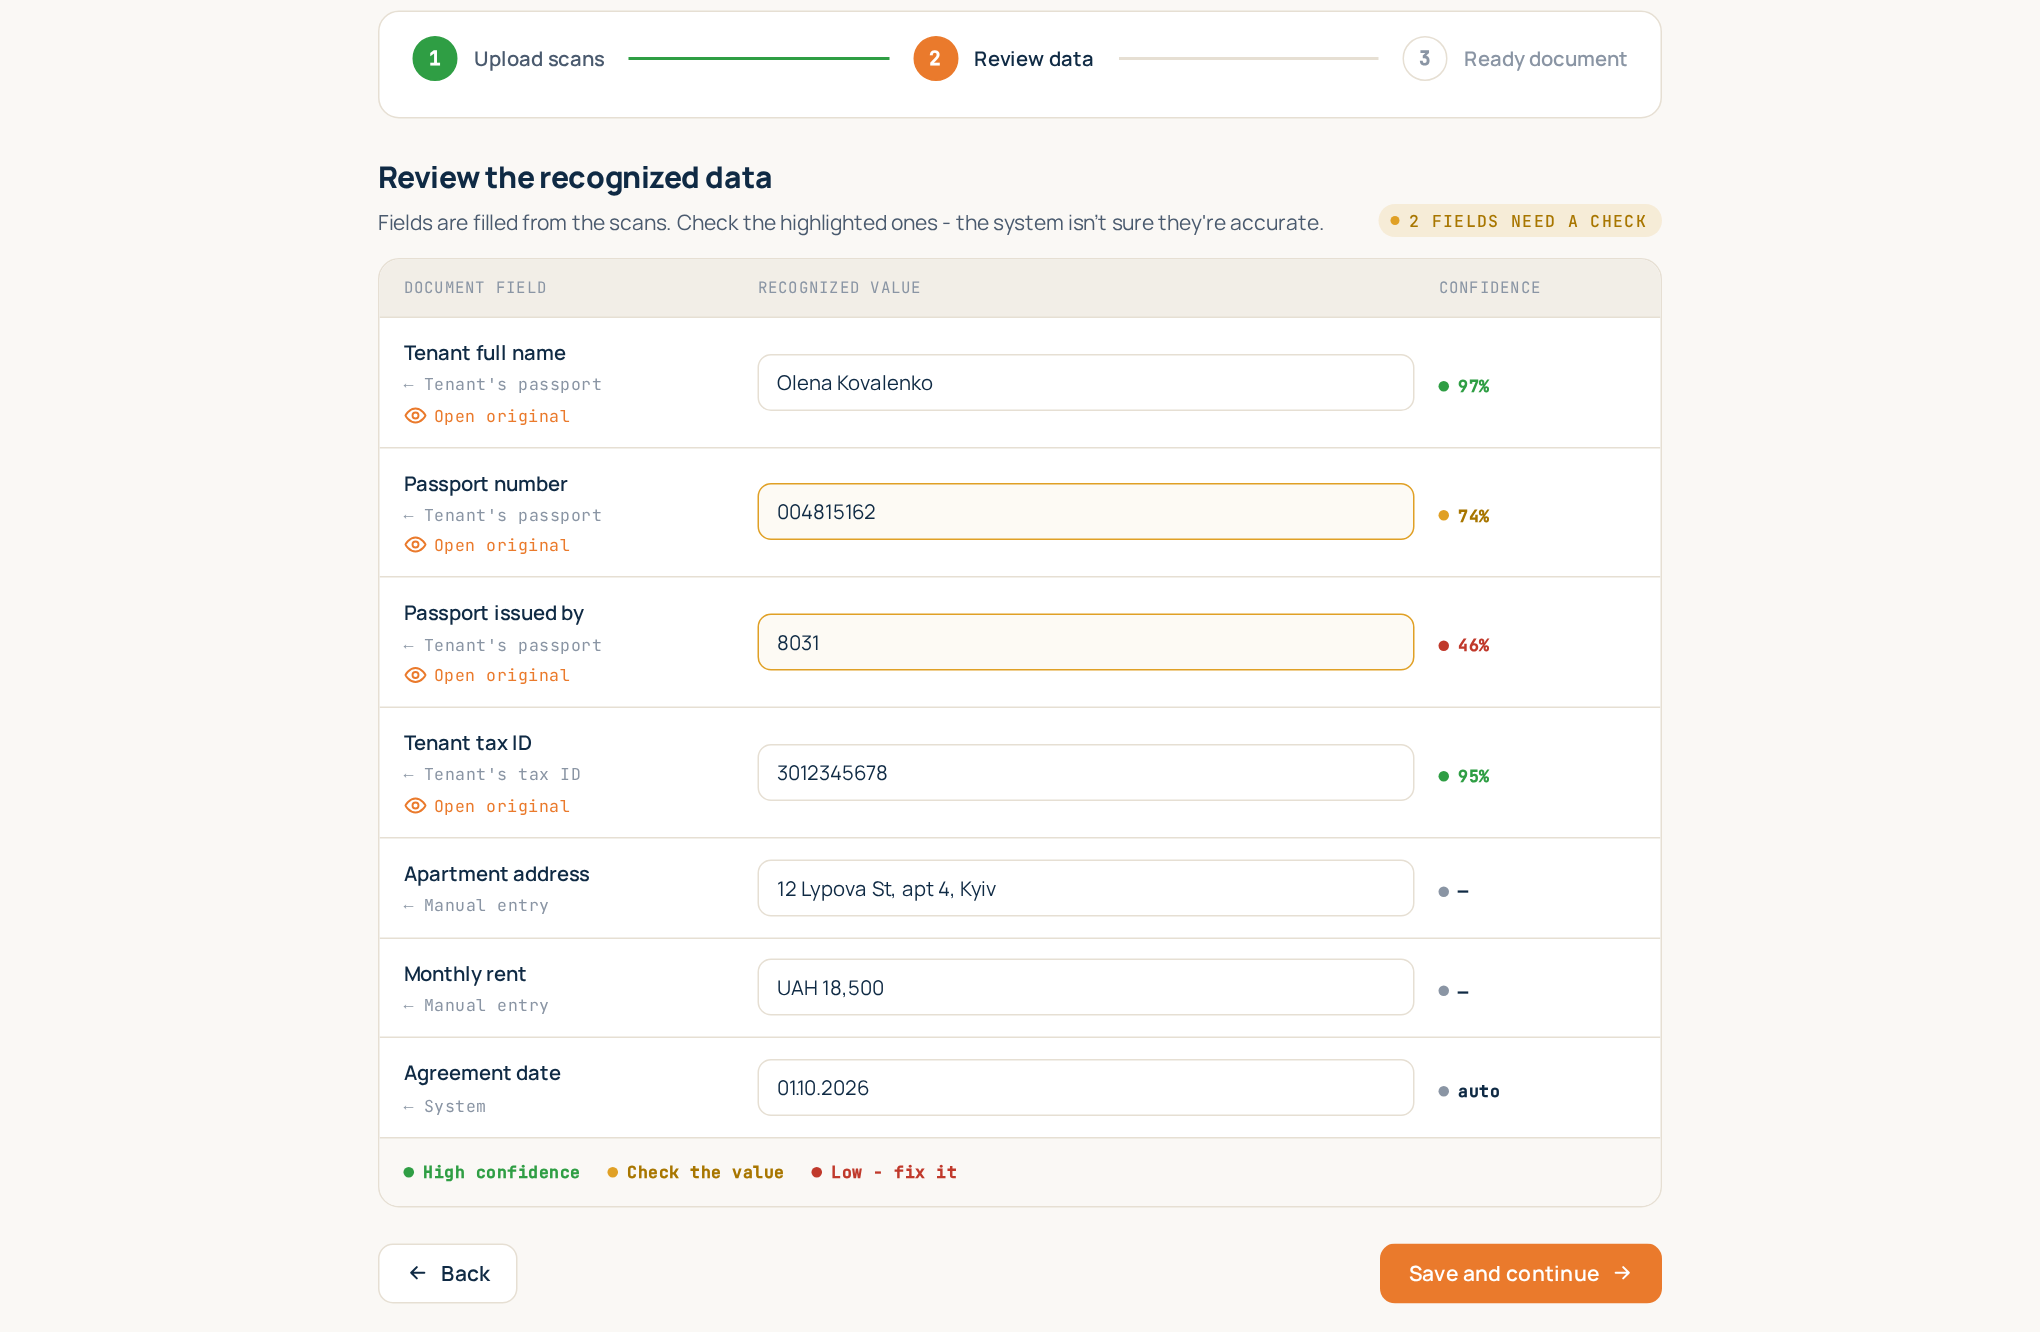
The colours tell you where to look first:
- High confidence — the value was read clearly.
- Check the value — probably right, but worth a glance.
- Low - fix it — the text was hard to read; check it against the original.
Select a field to see the Source fragment: the part of the scan the value was read from and its page. If the fragment cannot be pinpointed, Open original opens the full scan.
To correct a value, click it and type. A corrected value is marked edited, so you can always tell what you changed from what was recognised (auto). Fields with a Manual entry source are empty until you fill them; System values such as the date are filled for you.
If the template has a table with a variable number of rows (services, goods), the rows appear here as cards with Add row and Remove row. See Tables with a variable number of rows.
If the template has cross checks, any disagreement shows above the table.
With no values read from scans (a template without scans, or none uploaded), the step is called Fill in the data: plain data entry, without the confidence column, and the top says how many fields are still empty.
When everything is right, press Save and continue.
Step 3. Document ready
DocuTract fills the template and shows the result.
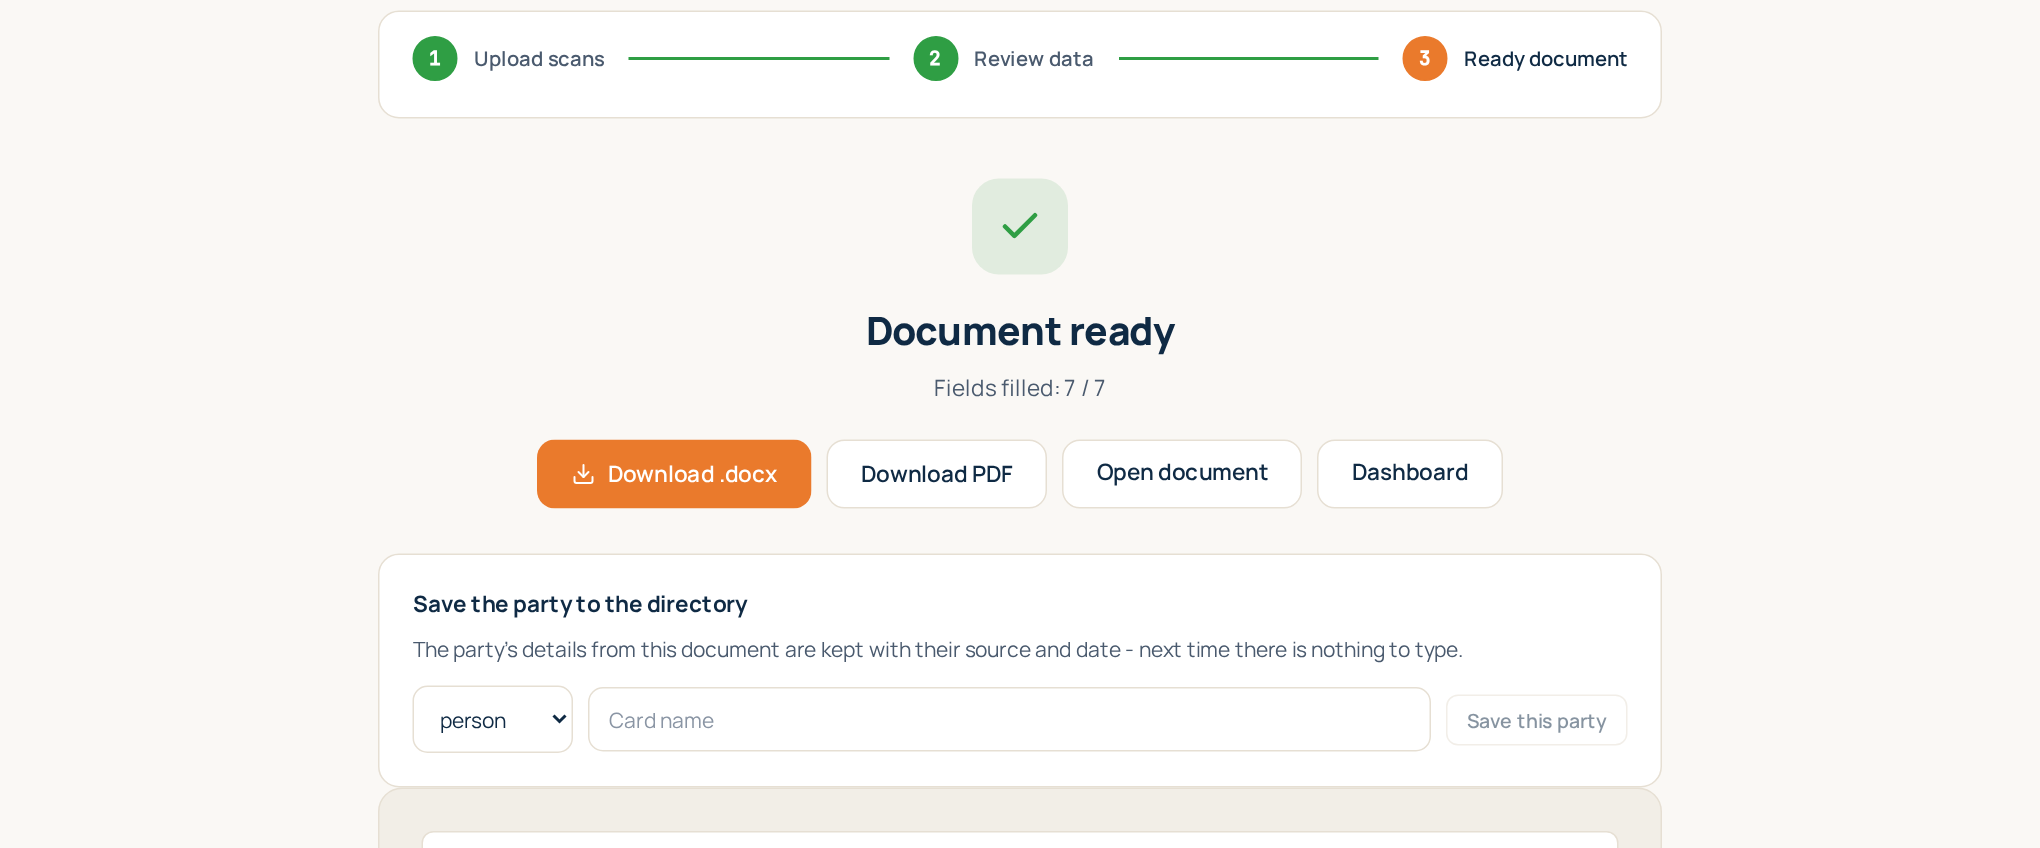
- Download .docx — an editable Word file, ready to send or tweak.
- Download PDF — for printing and signing.
- Open the PDF in a new tab — to read it at full size.
The document is saved under Documents, with its template, version, status and every value's source. You can open it later, correct a value and Regenerate.
A document started in a case leads back to it: the Back to the case button here and the link in the breadcrumbs. When the template's fields come from scans, this screen can also save the party to the directory; see The parties directory.
Good to know
- Quota. Each generated document counts towards your monthly quota. Uploading scans, recognising them and correcting values are free; so is regenerating a document because of an error. See Billing and plans.
- Stopped halfway? An unfinished document stays in the list with the Continue action, right where you left it.
- Several documents from the same scans? Put them in one case and upload the scans once.